Unlocking Landscape Photography: Finding the Best Aperture for Stunning Shots
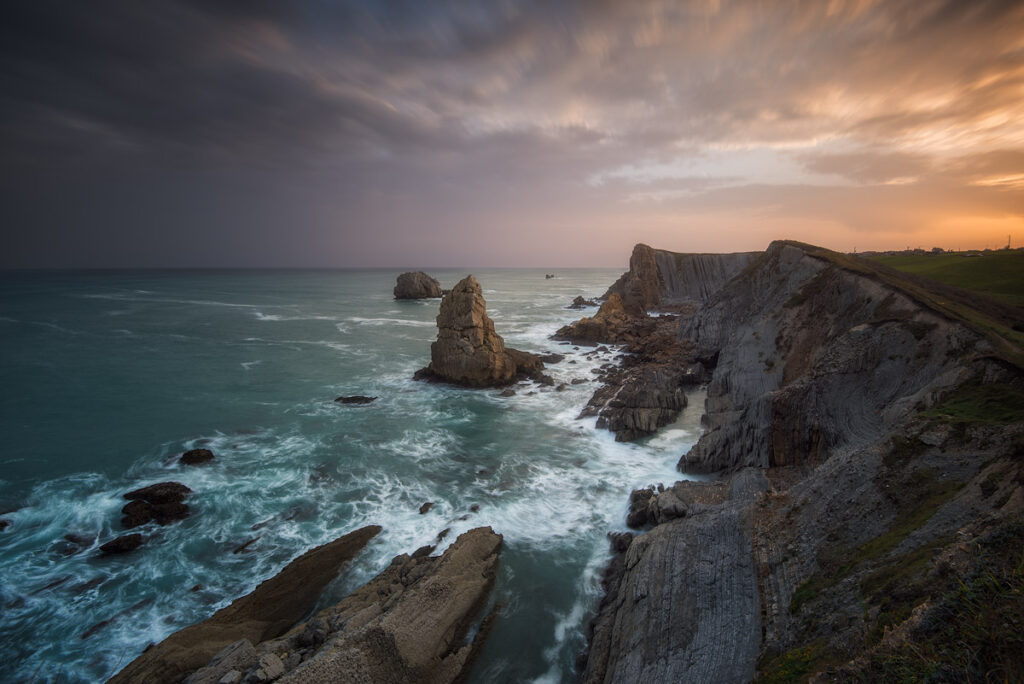
Landscape photography is an art form that allows us to capture the grandeur and beauty of the natural world. One of the most crucial elements in achieving breathtaking landscape photos is understanding and utilizing the right aperture. Choosing the best aperture for landscape photography involves balancing depth of field, sharpness, and diffraction to create images that are both technically sound and visually appealing. This article will delve into the nuances of aperture selection, offering practical advice and insights to help you master this essential aspect of landscape photography.
Understanding Aperture: The Foundation of Sharp Landscapes
Aperture, often denoted as f-stops (e.g., f/2.8, f/8, f/16), refers to the opening in your camera lens through which light passes. A smaller f-stop number (like f/2.8) indicates a wider aperture, allowing more light to enter the camera, resulting in a shallow depth of field. Conversely, a larger f-stop number (like f/16) signifies a smaller aperture, restricting light and creating a greater depth of field. Understanding this relationship is fundamental to determining the best aperture for landscape.
Depth of Field: The Key to Landscape Sharpness
Depth of field (DOF) refers to the area in your photograph that appears acceptably sharp. In landscape photography, a deep depth of field is generally desired, ensuring that both the foreground and background elements are in focus. This is where choosing the best aperture for landscape becomes critical.
To achieve a deep depth of field, you’ll typically use a smaller aperture (higher f-stop number). However, simply selecting the smallest aperture available isn’t always the best aperture for landscape photography. There are other factors to consider, such as lens sharpness and diffraction.
Finding the Sweet Spot: Balancing Sharpness and Diffraction
While smaller apertures increase depth of field, they also introduce a phenomenon called diffraction. Diffraction occurs when light waves bend around the edges of the aperture blades, causing a slight softening of the image. This effect becomes more pronounced at very small apertures, potentially negating the benefits of increased depth of field. Therefore, finding the best aperture for landscape involves striking a balance between sharpness and diffraction.
The Role of Lens Sharpness
Every lens has a “sweet spot,” an aperture at which it performs optimally in terms of sharpness. This sweet spot is often a mid-range aperture, typically between f/5.6 and f/11. At these apertures, the lens produces the sharpest images with minimal distortion and aberrations. Knowing your lens’s sweet spot is crucial for consistently achieving sharp landscape photos. Experimenting with different apertures and examining the results closely will help you identify the best aperture for landscape shooting with your specific lens.
Diffraction: The Enemy of Ultimate Sharpness
As mentioned earlier, diffraction can significantly impact image quality, especially at apertures smaller than f/16. While diffraction is often subtle, it can result in a noticeable loss of sharpness, particularly when viewing images at large sizes. To minimize diffraction, avoid using the smallest apertures on your lens unless absolutely necessary. This is crucial when determining the best aperture for landscape, as sharpness is paramount.
Practical Guidelines: Choosing the Right Aperture in the Field
Now that we’ve covered the theoretical aspects, let’s discuss practical guidelines for choosing the best aperture for landscape photography in the field.
The Sunny f/16 Rule and Beyond
The Sunny f/16 rule is a classic guideline that suggests using an aperture of f/16 on a sunny day to achieve proper exposure. While this rule provides a starting point, it’s not always the best aperture for landscape photography. Depending on the desired depth of field and the specific scene, you may need to adjust the aperture accordingly.
Prioritizing Depth of Field
In most landscape photography scenarios, maximizing depth of field is essential. Therefore, starting with an aperture around f/8 or f/11 is a good approach. These apertures typically offer a good balance between sharpness and depth of field. If you need even greater depth of field, you can stop down to f/16, but be mindful of potential diffraction. Consider focusing techniques like focus stacking to further enhance sharpness throughout the scene. [See also: Focus Stacking for Landscape Photography]
Considering Foreground Elements
When composing your landscape, pay close attention to foreground elements. If you have a prominent foreground subject, such as a flower or a rock, you’ll need sufficient depth of field to ensure it’s sharp along with the background. In such cases, a smaller aperture like f/11 or f/16 might be necessary. Remember to check your image on the camera screen and zoom in to verify sharpness. The best aperture for landscape here helps to keep everything in focus.
Using Hyperfocal Distance
Hyperfocal distance is the distance at which your lens is focused to achieve maximum depth of field, with everything from half that distance to infinity appearing acceptably sharp. Calculating the hyperfocal distance can be a valuable tool for ensuring sharpness throughout your landscape photos. Numerous apps and online calculators can help you determine the hyperfocal distance for your specific lens and aperture. Understanding and applying hyperfocal distance principles can significantly improve your chances of selecting the best aperture for landscape photography.
Advanced Techniques: Expanding Your Landscape Photography Toolkit
Beyond choosing the right aperture, several advanced techniques can further enhance your landscape photography.
Focus Stacking: Achieving Maximum Sharpness
Focus stacking involves taking multiple images of the same scene at different focus points and then combining them in post-processing to create an image with extreme depth of field. This technique is particularly useful when shooting scenes with significant depth, where achieving sharpness throughout the entire image with a single shot is challenging. Focus stacking allows you to use wider apertures (e.g., f/5.6 or f/8), which can minimize diffraction and maximize lens sharpness. [See also: Advanced Focus Stacking Techniques]
Tilt-Shift Lenses: Controlling Perspective and Depth of Field
Tilt-shift lenses offer advanced control over perspective and depth of field. The tilt function allows you to adjust the plane of focus, enabling you to achieve sharpness throughout the scene even at wider apertures. While tilt-shift lenses are more expensive and require practice to master, they can be a powerful tool for landscape photographers seeking creative control. Using tilt-shift lenses often allows one to use a wider best aperture for landscape work.
Post-Processing Considerations: Enhancing Your Aperture Choices
Post-processing plays a crucial role in refining your landscape photos and enhancing the effects of your aperture choices.
Sharpening Techniques: Adding Crispness to Your Images
Sharpening is an essential step in post-processing, as it can help to bring out details and enhance the overall sharpness of your images. However, it’s important to use sharpening judiciously, as over-sharpening can lead to unwanted artifacts and noise. Experiment with different sharpening techniques and settings to find what works best for your images. Post-processing can help enhance even the best aperture for landscape choices that you make.
Noise Reduction: Minimizing the Impact of High ISO
In low-light situations, you may need to increase your ISO to achieve proper exposure, which can introduce noise into your images. Noise reduction techniques can help to minimize the impact of noise while preserving detail. Be careful not to overdo noise reduction, as it can result in a loss of sharpness and detail. Even when using the best aperture for landscape, low-light conditions can necessitate high ISO settings.
Conclusion: Mastering the Art of Aperture Selection
Choosing the best aperture for landscape photography is a complex process that requires a thorough understanding of depth of field, lens sharpness, and diffraction. By carefully considering these factors and experimenting with different apertures, you can consistently capture stunning landscape photos that showcase the beauty and grandeur of the natural world. Remember to prioritize depth of field, be mindful of diffraction, and take advantage of advanced techniques like focus stacking to further enhance your images. With practice and patience, you’ll master the art of aperture selection and elevate your landscape photography to new heights. The key is to practice and determine the best aperture for landscape photography that suits your style and equipment.
Ultimately, the best aperture for landscape is a subjective choice that depends on your artistic vision and the specific characteristics of the scene you’re photographing. Don’t be afraid to experiment and try different approaches to find what works best for you. The best aperture for landscape is often the one that best captures the essence of the scene and conveys your intended message. Mastering aperture selection is critical for capturing stunning landscape photos, and finding the best aperture for landscape is often a matter of experience and experimentation. Continually refining your technique and understanding the nuances of your equipment will lead to consistently breathtaking results when seeking the best aperture for landscape photography.
