How to Fix a Leaky Faucet Sprayer: A Step-by-Step Guide
A dripping faucet is more than just an annoyance; it’s a waste of water and money. One of the most common culprits behind this irritating drip is a leaky faucet sprayer. Fortunately, fixing a leaky faucet sprayer is often a straightforward DIY project that can save you from calling a plumber. This comprehensive guide will walk you through the process, step-by-step, ensuring you can tackle this minor repair with confidence.
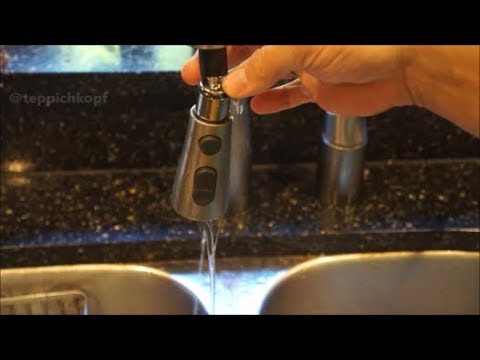
Understanding the Anatomy of a Faucet Sprayer
Before diving into the repair process, it’s helpful to understand the basic components of a faucet sprayer. Typically, a faucet sprayer system includes:
- The Sprayer Head: This is the part you hold and use to direct the water flow.
- The Sprayer Hose: A flexible hose that connects the sprayer head to the faucet body.
- The Diverter Valve: Located within the faucet body, this valve redirects water flow from the main faucet to the sprayer when activated.
- O-rings and Washers: Small rubber or plastic seals that prevent leaks at various connection points.
Leaks can occur at any of these points, but they are most frequently found at the connection between the sprayer head and the hose, or within the diverter valve.
Tools and Materials You’ll Need
To fix a leaky faucet sprayer, gather the following tools and materials:
- Adjustable Wrench: For loosening and tightening connections.
- Screwdrivers (Phillips and Flathead): Depending on your faucet model.
- Pliers: For gripping and maneuvering small parts.
- New O-rings and Washers: Purchase a variety pack or specific replacements for your faucet model.
- White Vinegar: For cleaning mineral deposits.
- Plumber’s Grease: To lubricate O-rings and washers.
- Clean Cloths or Sponges: For wiping up water and cleaning parts.
- Bucket or Towel: To catch dripping water.
Step-by-Step Guide to Fixing a Leaky Faucet Sprayer
Step 1: Shut Off the Water Supply
Before you begin any plumbing repair, it’s crucial to shut off the water supply to the faucet. Locate the shut-off valves under the sink. There should be separate valves for hot and cold water. Turn both valves clockwise until they are completely closed. If you don’t have individual shut-off valves, you’ll need to shut off the main water supply to your house. [See also: How to Locate Your Main Water Shut-Off Valve]
Step 2: Disconnect the Sprayer Hose
Carefully disconnect the sprayer hose from the faucet body. This connection is typically located underneath the sink. Use an adjustable wrench to loosen the nut connecting the hose to the faucet. Be prepared for some water to spill out, so have a bucket or towel ready. Once the nut is loose, you should be able to disconnect the hose by hand.
Step 3: Inspect the Sprayer Head and Hose Connection
Examine the connection point between the sprayer head and the hose. Look for any signs of damage, such as cracks, splits, or worn-out O-rings. If the O-ring appears damaged, carefully remove it with a small screwdriver or pick. Replace it with a new O-ring of the same size. Apply a small amount of plumber’s grease to the new O-ring before reattaching the sprayer head to the hose. Tighten the connection securely, but don’t overtighten, as this can damage the O-ring.
Step 4: Check the Diverter Valve
The diverter valve is located inside the faucet body and is responsible for directing water to the sprayer. Over time, mineral deposits can build up inside the diverter valve, causing it to leak. To access the diverter valve, you may need to disassemble part of the faucet. Consult your faucet’s manual or search online for specific instructions for your model. Once you’ve accessed the diverter valve, inspect it for any signs of damage or mineral buildup. Soak the valve in white vinegar to dissolve mineral deposits. If the valve is severely damaged, you may need to replace it. [See also: Replacing a Faucet Diverter Valve]
Step 5: Reassemble and Test
After inspecting and repairing the sprayer head, hose connection, and diverter valve, it’s time to reassemble the faucet. Carefully reconnect the sprayer hose to the faucet body, tightening the nut securely with an adjustable wrench. Turn the water supply back on slowly, checking for leaks at each connection point. If you notice any leaks, tighten the connections further or double-check the O-rings and washers.
Step 6: Cleaning Mineral Deposits
Hard water can cause mineral buildup in your faucet sprayer, leading to leaks and reduced water flow. To combat this, periodically clean the sprayer head by soaking it in white vinegar. This will dissolve mineral deposits and help maintain optimal performance. You can also use a small brush to scrub away any stubborn deposits. Rinse the sprayer head thoroughly with water before reattaching it to the hose.
Step 7: Replacing the Sprayer Head
If you’ve tried all the above steps and your faucet sprayer is still leaking, it may be time to replace the entire sprayer head. Sprayer heads are relatively inexpensive and easy to replace. Simply disconnect the old sprayer head from the hose and attach the new one. Make sure to use new O-rings or washers to ensure a tight seal. A new faucet sprayer can often resolve persistent leak issues.
Preventative Maintenance for a Leaky Faucet Sprayer
To prevent future leaks and prolong the life of your faucet sprayer, consider the following preventative maintenance tips:
- Regular Cleaning: Clean the sprayer head regularly to remove mineral deposits.
- Proper Lubrication: Apply plumber’s grease to O-rings and washers to keep them pliable and prevent leaks.
- Avoid Over-Tightening: Over-tightening connections can damage O-rings and washers, leading to leaks.
- Use a Water Softener: If you have hard water, consider installing a water softener to reduce mineral buildup.
When to Call a Plumber
While many faucet sprayer repairs are simple DIY projects, there are times when it’s best to call a plumber. If you’re uncomfortable working with plumbing, or if you’ve tried all the above steps and your faucet is still leaking, it’s time to seek professional help. A plumber can diagnose the problem and perform the necessary repairs quickly and efficiently. Furthermore, if the leak stems from a larger issue within the faucet body or plumbing system, professional intervention is necessary.
Troubleshooting Common Leaky Faucet Sprayer Issues
Here are some common issues that cause leaky faucet sprayers and how to troubleshoot them:
- Dripping from the Sprayer Head: This is often caused by a worn-out O-ring or washer at the connection between the sprayer head and the hose. Replace the O-ring or washer.
- Leaking from the Hose Connection: This could be due to a loose connection or a damaged hose. Tighten the connection or replace the hose.
- Water Leaking from Under the Sink: This may indicate a problem with the diverter valve or the faucet body. Inspect the diverter valve for damage or mineral buildup.
- Reduced Water Flow: This is often caused by mineral deposits clogging the sprayer head. Clean the sprayer head with white vinegar.
The Environmental Impact of Leaky Faucets
It’s important to address a leaky faucet sprayer promptly not only to save money but also to conserve water. Even a small drip can waste a significant amount of water over time. By fixing a leaky faucet, you’re contributing to water conservation efforts and reducing your environmental footprint. Every drop counts, and taking the time to repair a leaky faucet is a responsible and sustainable practice. Ignoring a leaky faucet can lead to hundreds of gallons of wasted water annually. Fixing a leaky faucet sprayer is an easy way to be more environmentally conscious.
Choosing the Right Replacement Parts
When replacing O-rings, washers, or the entire sprayer head, it’s important to choose the right replacement parts. Take your old parts to a hardware store to ensure you get the correct size and type. Using the wrong parts can lead to leaks or damage to your faucet. Consider purchasing parts specifically designed for your faucet model for optimal performance. A leaky faucet sprayer can often be fixed with generic parts, but brand-specific replacements are often more reliable.
Conclusion
Fixing a leaky faucet sprayer is a manageable DIY project that can save you money and water. By following these step-by-step instructions, you can diagnose the problem, replace worn-out parts, and restore your faucet to its optimal performance. Remember to shut off the water supply before beginning any repairs, and don’t hesitate to call a plumber if you’re uncomfortable working with plumbing. With a little patience and the right tools, you can conquer that leaky faucet sprayer and enjoy a drip-free sink. Tackling a leaky faucet sprayer is a great way to improve your home and reduce water waste. Addressing a leaky faucet sprayer promptly can prevent further damage. If you have a leaky faucet sprayer, don’t delay in fixing it. A leaky faucet sprayer is a common household problem. This guide helps you fix a leaky faucet sprayer effectively. Remember to always prioritize safety when dealing with plumbing. A leaky faucet sprayer can be a sign of a bigger problem. Learning how to fix a leaky faucet sprayer is a valuable skill. Fixing a leaky faucet sprayer contributes to water conservation. Understanding the causes of a leaky faucet sprayer helps in prevention. A properly functioning faucet sprayer improves kitchen efficiency.
